Simple Saturday Prep: Easter Lily Necklaces

Indulge me, won't you, my dear friend, as I share a profoundly moving poem my beloved father recited each and every single Spring his was living. EACH and EVERY Spring, mind you! Here goes...

Spring has sprung.

The grass has rizz.

I wonder where

the birdies is. 

Pretty incredible, eh? That being said, I'd like to dedicate this week's activity to my pop, Charlie Beck.

Help me celebrate the birdies' arrival and the rizzing of spring-time grass by making an Easter Lily Necklace with me tomorrow, won't you? The supplies you'll need are one empty styrofoam egg carton, scissors, a few plastic drinking straws, some yarn, and some tape. That's all!

We'll make something lovely enough to wear with your Sunday best on Easter morning! 

See you tomorrow!!!! 

Simple Saturday: Pot-o-Gold Treasure Hunt

Gather round, leprechauns. Let's seek and find that illusive pot-of-gold, shall we?

Before we can have a Rainbow's End stake-out there is some behind the scenes, top secret, clue-dropping prep work that must be done. Whoever you desire to surprise by the treasure hunting process must not know anything about this trickery, either. They'll discover your secrets in due time. You, my Simple Saturday friend, are the one that I intend to surprise.

Follow me.

Oh, my stars! What is that I see beneath the plant draped over my dusty coffee table? A leprechaun's top hat?

Let's look closer. Oh, my! There's a note tucked under the coaster! I wonder what it says, don't you? I'll open it and read it to you. Don't be scared.

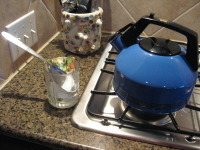
Candles burn all in a row, that's where a clue can be found, you know.

Candles in a row! I have a long wooden rack with a row of yellow candles in my den! Could it be? Let's see!

Yes! There it is. Another clue...I wonder what this one says.

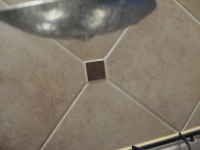
Wipe your feet when you come through the door. No leaving tracks on the clean tiled floor.

Door? Wipe feet? Could that mean a rug? Oh! There's a rug by the front door! Take my hand. Let's check together, shall we?

What do you know...There's another note. See it? Tucked under the rug? Well, I'll be (Old people always say that, don't they? I'll be.).

What does this note say? (I'm having fun. Are you?)

Where Tripod rests his sweet head, we're told, is where you'll find a Pot of Gold.

Where Tripod rest his sweet head? Where could that be? He snoozes all over the house...but he sleeps in his kennel at night. Oooo...let's check there. Come on!

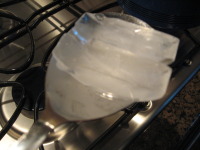
Will you look at that...on top of Tripod's kennel...a clay pot and a little green hat. How cool is this?

Let me open it to be sure that there is gold inside.

Stay close.

I'm a little freaked out, here.

Why...yes! There is gold in the pot! We found the Rainbow's End right here in Tripod's bed! Yippeee!!! We did it!

 Note to parents and teachers: I have found this game to be a wonderful motivator for kids who are resistant to read or to write. If they're non-readers, lay out the clues for them. Early readers will need only one word for a tip. More advanced readers willingly read full sentences with the hope of finding a pot of gold at the end of the quest. Talk about natural reinforcement!

If a child is resistant to write, employ them as a clue maker. Kids love to play a role in a secret ploy such as this one. Once again, clues can be composed in conjunction with the  writer's level of expertise.

In this game, the Pot-O-Gold Treasure Hunt, readers painlessly practice reading skills. Non-writers become prolific poets and, together, everyone joyfully discovers that illusive literary Pot-of-Gold!

Simple Saturday Prep: Pot-o-Gold Treasure Hunt

Are you feeling it? The luck of the Irish? I am, for sure.

Join me to tomorrow and I'll show you where the rainbow ends...somewhere smack dab in the middle of your own home! No blarney about it, me boy.

All we need for tomorrow's treasure hunt is a sheet of paper, a pencil, some sort of golden something-or-other, and your brilliant imagination. Super-dee simple, remember?

Yesterday, at the craft store, I picked up a half-priced bag of plastic gold coins and some charming wee leprechaun hats for next-to-nothing. You can do the same thing, if you want to, but it isn't necessary to have to go out and buy stuff to enjoy some Simple Saturday fun with me! Nope.

Well, for now...top o' the morning to ya'! I'm looking forward to seeing you tomorrow.

Simple Saturday: Somewhere Over the Rainbow Writing

The Wizard of Oz gang is here to Rainbow Write with us. Isn't that great? Each one has come to spell out their deepest desires. I'll share my wipe-off board and markers with them. After all they've come such a long, long way skipping along that winding yellow brick road through that snoozy poppy field. Heck, they even battled a fleet of flying monkeys to have to chance to spend Simple Saturday with us.

Supplies, anyone? I'm using a wipe off board and dry erase markers. How about you?Let's get on with it, shall we? Let's Rainbow Write!

The Cowardly Lion wants to go first. Remember what he wanted? Courage.

Okay, to begin Rainbow Writing print a word in one color. Make your letters big now. Make those letters sizable and neat. They're going to be supporting a rainbow of colors, you know.

See how I wrote the lion's desire? 'Courage' is neatly written in black.

All right now, to Rainbow Write, choose a another color and trace over each letter of the word. After you've rewritten the word in a color, say red, chose another color to rewrite the word with. Do it again. Trace over the letters with another color--blue, for instance. Repeat the process over and over again until the word is written in letter rainbows! Isn't this simple? And fun?

Let's let the Tin Man have a turn. Remember what he wanted?

That's right. He wanted a heart.

Next is the Scarecrow (my favorite character). What was it he asked the Wizard for? You guessed it. A brain. Something that he seemed to have within himself all along, right? 

And lastly, what was Dorothy wishing for as she click, click, clicked the heels of her ruby slippers together? Remember?

Home. She wanted to go home. Even though that was the very place she had run away from in the beginning, the silly girl. But, if she hadn't run away in the first place, there would be no story at all, would there?

You know, I have to agree with Dorothy's logic. She's right. There is no place like home, especially on Simple Saturday. No place I'd rather be than home Over the Rainbow Writing with you and the Oz gang!

Simple Saturday Prep: Somewhere Over the Rainbow Writing

Tomorrow's activity is suited for young ones who are learning how to write their names or older ones who are practicing spelling patterns in hopes of acing the weekly spelling test. Judy Garland's going to join us. To To is, too!

Here's what you need to gather up. A big piece of easel-sized paper and a bunch of markers, a rainbow of colors. I am going dip into my writing workshop supplies and grab my 11 x 17 sized wipe-off board and a handful of colorful dry erase markers. Now don't go out and buy anything special. Remember this is a Simple Saturday activity and we do everything on the cheap. You can use the side of a cardboard box if you like. All we need is a fairly large area to write on and a rainbow of colors.

Oh, and you might want to keep a bucket of water nearby in case the Wicked Witch shows up. She has a scary way of ruining a good time, you know.

We'll melt her in her tracks.

Simple Saturday: Fancy Bird Nests

Ty left a bunch of great bird nest supplies supplies behind. Just check it out! We've got the produce bag webbed netting, some snazzy yarns, threads, and ribbon, and a pair of scissors. All right! Mama Dove is about to get an  upgrade!

Let's begin by cutting pieces of yarn and ribbon into...oh...say...five inch pieces long. (Wow...Ty even left a roll of some glimmering gold lame'. Oooo, la la!) Go ahead. Cut a cluster of pieces. We'll make good use of them.

Now all you have to do is weave a piece of yarn/ribbon into a space in the webbed netting. Simple! No need to knot it. We don't want to have to make Mama Dove work hard, do we? Just poke the end of the thread into one of the holes in the webbing, pull it through a little, and let the thread hang loosely in the net. Go on...use all of the colors. Fill your net with colorful nest making options.

When you're finished, simply tie your netted bag to a tree limb. That's all you have to do. All Mama Dove needs to do is grab one of these gorgeous threads in her sweet little beak and tug. That's easier than any trip to Home Depot!

Are you ready for the reveal? Since we don't have a bus, a bright red umbrella will have to do. Oh...where did I put that blow horn?

Here we go...John! Ready?

On three...One

Two...

Three...

MOVE THAT UMBRELLA!

Ahhh! Can you hear those doves cheering?

Jumping! 

Weeping!

Saying, "It's so beautiful..."

Simple Saturday Prep: Fancy Bird Nests

For three years now a beautiful white-winged dove comes back to her nest snuggled in a scrawny limb in our backyard Live Oak tree. As predictable as the sunrise, she and her mate return to work together spiffing up their drab, grassy home, and then she precedes to lay a nestful of eggs. John and I...even Tripod...enjoy checking in on her daily. She simply ignores us and goes about her sitting as if we weren't even there. 

I'm thrilled to announce that the dove family has returned a little earlier this year. They're currently busy in the spiffing up stage, flying about with bits of dry grass in their beaks. So this Saturday I thought we'd give Mama and Papa Dove a little hand. What do you say?  Let's add a little pizzazz to their crib...an Extreme Makeover - Bird Edition. I contacted my good buddy Ty Pennington to give me a hand with this renovation project. 

Here's what we need for the renovations: an empty netted produce bag (I used a red netted bag that was once full of Clementines. Yum.), bits of brightly colored curling ribbon, colorful yarn, and/or string.

Sadly, there won't be any bus to move when we're done. Oh well...


Simple Saturday: Makayla - Pennies vs. Washers!

You don't scare me, you big brut!Ready for big Makayla showdown? Pennies/me vs. washers/John? Let's get ready to rumble!!!!!

Game supplies....couldn't be simpler.Behold Makayla supplies, in the truest of Simple Saturday style...an egg carton, 18 pennies and 18 washers. To create the game board, simply cut the top and side flap off of the carton. Let the battle begin!

Place 3 of your objects in each egg cup. See how I've placed my pennies down one row and John has placed his washers down the other?

Menacing, eh?


I'm first, naturally. I pick up a group of 3 pennies and, beginning at the cup to the right of my starting point, drop one penny at a time, moving to the right, towards John's washers. As I move, I drop one object in each consecutive cup. I start on my side of the carton and then move to John's. Because my last penny landed in John's first cup of washers, that means that I can scoop up his three washers for my See my last penny on top of John's washers? Got em!own. Ha! Take that!

That's the way you move around and around and around the board. You place an object in each consecutive cup beginning to the right of the cup with which you began. When your last object happens to land in a cup with some of your opponent's objects in it, they're yours! It is all about creating a strategy for your last object in your series to land in a cup filled with some of your partner's playing pieces.  

Now it is John's turn. He follows my plan and takes three of my washers. That's okay, I'll get him back. And so it goes, around the egg carton game board we go. He gets a few of mine. I get a lot more of his.

Poor John...he's all washed up. Get it? Washed up?And in the end, I am the victor!! I have scooped up all of John's washers. I'm the last penny standing!!!!

I'm the Makayla champion of the world!!!

Oh, John...don't be sore loser.  

Come on.

Let's play again. You can go first this time.

Simple Saturday Prep: Let's Play Makayla!!!

Hurry up...scramble the rest of those eggs. Empty out that egg carton. We need it to play a really fun game called Makayla!!! That's right. Clear out that egg carton and bring it with you tomorrow and I'll teach you how to play a game that will give you hours of Simple Saturday fun.

Also, along with the carton you'll need to gather up some small objects. You'll need find 18 of one type and 18 of another. For example, you might want to find 18 buttons and 18 beads, or 18 pennies and 18 noodles, or 18 small stones and 18 acorns.

Hey, let's do this in true Simple Saturday style! Let's have a super great time playing a fun game and not spend a single cent doing so! 

Ya hooo!!!

Simple Saturday-Cupid's Favorite: Hershey's Chocolate Roses

As we go through the steps of making chocolate roses, I encourage you to think of that ever-so-special someone that you are creating these for.  Think about the many good qualities your sweet one has. Think about the times that they made you laugh, helped you when you were sad...you know...all that lovie-dovie stuff. And if you do think about these things while we work together then maybe, just maybe, all of those 'love thoughts' will become part of this Simple Saturday gift you're making for them...Maybe.

Let's begin. Got the supplies? The Saran Wrap, the florist wire, the florist, tape, the Hershey's Kisses, and the optional silk leaf? 

Okay, tear off an approximently 6 inch piece of Saran Wrap. Cut that larger piece in half.

Next, place the flat sides of two Hershey's together. Your rose bud is beginning to bloom, my friend.

Cover the 'bud' with a piece of Saran Wrap. You'll need to gather a tail of wrap underneath the bud. Go ahead and twist that tail of Saran Wrap to make it look like the tightly wrapped end of a cellophane covered piece of candy.

Fold a wire in half (Hint: I used 20 gauge wire. Easier on the fingers. You'll see why in a minute. Keep thinking those good thoughts...). At the half mark of the wire, twist around the Saran Wrap tail. Make your wire twist pretty firm, as close to the bottom of the bud as you can. You don't want a wilted rose bud, do you?

Here comes the tricky part...the florist tape. The secret to getting the tape to adhere to itself as you wrap around the wire stem is to s-t-r-e-t-c-h the tape. When you stretch it, the tape gets sticky and gummy...good stuff for rose making. So, go ahead, stretch and twist, stretch and twist, wrap that tape all the way to the ends of your wire.

All right, if you want to add a silk leaf go ahead and do so. Secretly, between you and me, pal, I didn't buy my silk leaf at the craft store. I snipped mine off of a kitchen flower arrangement. Shhh. Don't tell.

So there you have them...Chocolate Roses! Aren't they gorgeous?

 Who did you think about while we made these? You know who I did? YOU! I thought about how grateful I am that you spent a little bit of a Simple Saturday with me! Thank you for that and bless you, my Simple Saturday friend.

Have a love-filled Valentines Day. Make Cupid envious!

Simple Saturday Prep: Hershey Kiss Chocolate Roses

Rather than breaking the bank finding ways to express one's undying affection for another, why not keep it simple? Let your beloveds know how much you care by making a tiny treasure, one that just night become a lifetime tradition. Make your sweetheart some Simple Saturday Hershey Kiss Chocolate Roses!

Here's what you'll need to gather up, my friends. You need florist tape (This stuff is a little tricky to manage. Don't worry, though. I'll show you some techniques for successful twistage.), medium gauge florist wire, Saran Wrap, and a bag of Hershey's Kisses.

For an optional accent for your Simple Saturday Chocolate Roses, you can buy some of those little silk leaves florists use for making corsages. They can be found at the craft store near all of the wedding stuff. But, if you're keeping costs low, in our celebrated Simple Saturday style, you can skip the leaves. We'll do just fine without them.

Now go out there and love it up! See you tomorrow, sweetheart.


Simple Saturday Sneak Peek - Valentine's Day Edition

Being that this week's Simple Saturday post is of the seasonal variety, I thought I'd give you a head's up as to the project we'll be making.

Before you go out and buy some expensive Valentine's Day gifties check in with me and I'll show you how to make chocolate roses!

That's right. You heard me. (Cue the sexy French accent) Chocolate Roses a la Simple Saturday.

Cupid ain't got nothin' on Simple Saturday Chocolate Roses.

Nothin'.


Simple Saturday: The Ever-So-Awesome Hamburger Cookie

The moment you've been waiting for has finally arrived! Move over Mickey Dees. Make room for the cookie of all cookies -- the Hamburger Cookie.

You ask how can vanilla wafers, coconut, peppermint patties, food coloring, and your optional sesame seed combine to become a hamburger? Well, I'll show you right here and now!

First of all we must make our condiments. Pinch a healthy clump of coconut with your immpeccably clean fingers and place it in a small bowl. I used three bowls...one for my ketchup, my mustard, and my pickles. Squirt a sizeable bit of food coloring in with the coconut and stir! Whalla! Coconut condiments! Of course, if you prefer mayo on your burgers you can leave the coconut white, if you'd like. Come on...use your imagination now.

Next, let's start with a foundation...the bottom half of the bun. For this, lay one vanilla wafer on a plate. (I made a few extras. You know that John will want a couple when I'm done, right?) Top that bottom bun with a pattie of the dark chocolate and peppermint variety. Now choose your desired condiments. As you can see, I've made several tasty coconut condiment combination samples here.

Place the top vanilla wafer bun over the coconut condiments. Slightly dampen the top of the bun with water. Place a wee pinch of sesame seeds over the top bun's slightly dampened spot. Wow! Don't these cookies look like hamburgers already? But hold your fries...we're not finished yet.

Stick your hamburgers in the microwave for 15 seconds. This will melt the pattie just enough to make the whole thing stick together nicely, as well as fill the kitchen with a fabulous minty aroma.

And, lo and behold, you have made Hamburger Cookies fit for the Burger King!!! Let them cool for a few moments, maybe even place them in the fridge for a little while. This will help them to mold into a truly believable hamburger-like form.

Go ahead, have some simple fun making these treats. They're easy to make, terrifically tasty, and unique enough that you, too, might win the coveted blue ribbon at the all-school bake-off!

Psst...Don't you know those mothers that entered their cookies made from expensive family recipes were pickle green with envy when my daughter and I won with these hamburger cookies? Serves those mamas right, don't you think? They should've been baking cookies the Simple Saturday way!

Simple Saturday Prep: The Hamburger Cookie

It is only because you and I have become dear Simple Saturday friends that I am willing to share my secret blue ribbon cookie recipe.

You see, I am not baker. Never have been. Never will be. BUT years ago my daughter and I once won the highest honor of "The Best Cookie Ever" at a school bake-off with the coveted recipe I am about to share with you....The Hamburger Cookie.

So, hold the mayo and gather up these ingredients; vanilla wafers, peppermint patties, coconut, yellow and green food coloring, sesame seeds (optional), water, and a very clean small paint brush.

Get the goods and let's have some super-sized fun tomorrow, shall we? See you on Simple Saturday.

Simple Saturday: Rainmaking

Making rain couldn't be simpler. Watch this...or even better... join me, okay?

Pictured are the supplies needed -- the tea kettle filled with water, a metal spoon, and some ice cubes. (Ignore my homemade mosaic utensil holder in the background. I'll show you how to make one of those another time.)

Turn the heat on high and let that tea kettle get so hot that steam whistles shrill out of it. (Making rain is noisy business, let me tell you.)

Balance a few ice cubes in the metal spoon.

Be careful with this next step, pal.

Hold the spoon ice cube over the kettle's screaming steam.

Rain!!! I know, I know...I didn't promise you a monsoon, but it is rain.Look! In no time at all, water droplets condense on the bottom of the spoon! Rain! We made rain!!! 

You know, my Simple Saturday friend, you might enjoy doing a bit or research regarding this weather-related phenomenon. This is the short and sweet version of what I know about the creation of real rain.

It's crazy cold way up high in the atmosphere...big time cold...like the ice cubes. Rain clouds form way up there, too.  When warm air and water vapor (the screaming steam) from the Earth rises and hits the cool air way up high in the dark and cloudy sky water droplets form and...pow...RAIN!

Don't take my word for this. Find out for yourself. Ask your weatherman. Read some books or good webpages. See if I'm right and then come back and tell me what you found out. 

Happy puddle-jumping!

Simple Saturday Prep: Rainmaking

 Who needs a dark and stormy night to whip up a little rain? Not us.

Tomorrow I will show you just how to stir up a wee bit of weather by using a tea kettle, some ice cubes, a wide metal spoon, and some water. We'll be using the kitchen stove so, since this activity involves some heat, it'd be best if an adult is somewhere nearby.

Save your rain dance for another time and join me in the simply soggy fun!

Simple Saturday: Bathtub Soap Crayons

Hey, Simple Saturday pal! Look at my box of Ivory Snow nestled up in a bank of real, true-to-life, super-deep Vermont snow. Isn't that awesome? Can you believe it? Remember I'm a Texas girl, and traipsing around in snow deeper than the soles of my shoes this is a pretty big ding-dang-deal!

Enough about the winter wonderland I just left behind, ready to make some soap crayons? All we need is soap flakes, hot water (and I do mean HOT), a mixing bowl, and some kind of mold to have the soap crayons. I decided to use a muffin tin. John had the great idea to line the tin with muffin cups...good idea. Optional, but good.

Here we go. Dump the soap flakes in a mixing bowl. Gradually wet the mixture with the hot, hot, hot water. Stir like the devil to thicken the soap crayon mixture. 

Pour mixture into smaller bowl add a few big squirts of food coloring and keep stirring.

 I drafted John to help me stir. Enthusiastic, isn't he? 

Next, pour your colored soap mixtures into your mold. Place your mold in the freezer for a few hours.

Go to a movie or maybe out to eat, and when you return...BAM...you'll have some awesome soap crayons waiting for you.

Now fill up the bathtub with some cozy warm water. With your nifty soap crayons in hand, climb on in and simply draw on the tile to your soggy heart's content. Talk about good clean fun, eh?

See you next week!

Simple Saturday Prep: Bathtub Soap Crayons

Are you ready for a squeaky clean adventure? Well, I am, and so is this little fella in this picture.

Scavenge up some Ivory Snow (or any other type of soap flakes), hot water, and food coloring to make some cool crayons together. If you can find an old ice tray or small molds of some kind, that'd be good.

So come back by tomorrow morning to have some more Simple Saturday simple fun!!!


Simple Saturday: Paper Clip Illusion

Meet my good friend David Elzey, children's author extraordinaire. Throngs of people have gathered together in the Vermont College dining hall to witness his incredible performance of an amazing magic trick, the Paper Clip Illusion.

Here he is, holding an every day, nothing special, plain old white envelope and only five paper clips. One by one, David drops the paper clips into the envelope.

Being the cagey fellow that he is, David puts the every day, nothing special, plain old white envelope and the five paper clips behind his back.

After chanting his magic word Publishcio three times, he brings back around to face the audience. Ever so cautiously, David lifts the envelope flap and...oh, my goodness...how did that happen? The lunch room crowd breathes a collective, "Ooooooo." The paper clips are linked together! For real! It's magic!

Or is it, really? 

David was able to wow the crowd with this cool magic trick because of the ever-so-easy prep completed beforehand. Here's what you'll need to do. 

You already have the supplies needed for this illusion, right? Two identical white envelopes, tape, and 10 paper clips. What could be simpler?

Linked and Non-linked paper clipsMove in closer to study those paper clips. Notice that five of the paper clips have been linked together and five of them are loose? Well, my dear friend, therein lies the trickiness of this trick. Hold on to your alacazam. I'll show you what I mean in just a moment.

Neatly tape the envelopes together with the flat, address sides touching. See the two open flaps opposing one another?

Before David called his audience together, he slipped the linked paper clip chain into one of the open envelopes flaps. That sneaky monkey...

David concealed the trick's secret while performing this illusion by carefully keeping the side of the magic envelope containing the paper clip chain close to him while he dramatically dropped  the loose paper clips into the empty side. When he put the magic envelope behind his back, David switched it around causing the paper clip chain side to face his mesmerized audience. Once again, he was very careful to keep the secret side of the magic envelope concealed as the dazzled crowd beheld the linked paper clip chain periously dangling from his fingertips.

W-H-O-A.

I know...the thrill of this trick is a far cry from pulling real rabbits of out of fancy hats. Look on the bright side. Have you ever cared for a rabbit? If so, then you know that, with this trick, the clean-up is a whole lot easier!

Simple Saturday Prep: Paper Clip Illusion

This week let's have a bit more magical fun, shall we?

Most of us don't have a silk top-hat or a furry white, pink-eyed rabbit sitting around the house to use as Simple Saturday supplies, do we? Fear not. We can still make some major magic using only two white envelopes, ten paper clips, and some tape.

Truly...that's all we need...two white envelopes, ten paper clips, and some tape.

Simple, right?

You bet.

So, go on . . .hop, hop, hop around the house, gather up these supplies, and meet me back here tomorrow morning. 

Poof!