Simple Saturday Prep: The TP Roll Kaleidoscope

Tomorrow's Simple Saturday post will be another one of those shamefully simple projects. I feel as if I should let you know that I capable of complication, yet prefer the simply sublime.

Here's all that is needed to create you very own TP Roll Kaleidoscope - one toilet paper roll, some cellophane food wrap, a rubber band, and a pinch of some sequin-like shiny stuff. Pretty simple shopping list, eh? 

Hey I know!

Let's ask Lucy in the Sky to join us as we make our very own kaleidoscope eye, shall we?

See you tomorrow!

Simple Saturday: The Word Bottle

I had such a blast making my Simple Saturday Word Bottle. Isn't it fine? Don't you love it?

Remember the materials we need to make this treasure? A smooth-sided bottle, some magazines, glue, and scissors?

Okay, y'all, I must confess...this is another one of those shamefully super simple Simple Saturday posts that incorporate maximum fun and the educational factor all rolled up into one.

So, hey, all you have to do (or all the kids have to do) is cut out words that they like from of the magazine. Words that they can read independently. Words that they can identify with with. Words that build their developing sense of autonomy as readers. You get the picture, right?

 And then glue them on to the bottlein a word cloud-esk fashion. That is it!

Boy howdy! If you got a a resistant reader, this is the craft for you. If the kiddo can read it independently -- the word goes on the jar.

End-o-story.

Simple Saturday Prep: The Word Bottle


 Tomorrow's activity is one that early readers love, love, love!

I hope you didn't put away last week's magazines, glue, and scissors because we're going to use them again to make a Simple Saturday Word Bottle. One other thing that you'll need to track down is a small bottle of some sort - something with smooth sides. I found a spice bottle I'm going to use. 

There's bound to be something around your house you can make a Simple Saturday Word Bottle from. Check the pantry. Scope out the fridge.

Have Pop gobble down that last little bit of picante' sauce molding behind the mayonaise. And tell him to hurry. You need the jar for Simple Saturday!


Simple Saturday: The Color Wheel

 This project was simply delightful to make. I had a ball snipping, gluing, matching, sorting, and organizing. I just wish you could have been here with me. Oh, the chit-chatting we would do!

Here's how I made a Simple Saturday Color Wheel. First of all I gathered up a stack of magazines, a gluestick, a small piece of poster board, a pencil, scissors, and a tasty hot cup of coffee. What's a Saturday morning without coffee?

Also, I found a nice image of the Color Wheel on the web. I printed it out to use as a guide and then, at the last minute, decided to use it as part of the project.

 After I cut the poster board in a circle (Hint: I used a small plate as a template to trace around.) I drew starry triangular pizza-like lines on it. Then I leafed throught the magazines to find colors to snip in tiny mosaic shapes. Following the color wheel guide, I easily glued my colorful mosaic snips in their designated spot on the Simple Saturday Color Wheel.

Lastly, I stuck the downloaded web image on the center of my Simple Saturday Color Wheel and...pop...there you have it!

Dang...now I have the hankering for some pepperoni.

Home Slice, here I come.

Simple Saturday Prep: The Color Wheel

I'm not sure whether it's that I'm busy preparing to speak at the big time American Montessori Conference or that I so miss working with the Color Boxes with the kiddos...but, tomorrow we're going to play with the Color Wheel.

Are your kids learning the names of various colors? Are they working to evaluate the variance between hues? If so, let's make a Color Wheel a-la Simple Saturday style, shall we?

Honestly, my Simple Saturday pal, throughout my years of teaching Montessori with the primary-aged child, I think I had more fun differenciating between colors than the students did. I just acted like the all-knowing adult. And, you know, I think sometimes those rug rats saw clean through me...the little stink pots.

Anyhow...for tomorrow's supplies we will need a piece of poster board, craft glue, scissors, and a collection of old magazines.

Actually, we'll be using that collection for magazines for a few weeks after this one.  Talk about a creative way to recycle!

Simple Saturday: Magazine Bead Bling

So simple to make and stunning to wear. Aren't these Simple Saturday Magazine Beads simply breathtaking? And they can yours for the low, low, low unbeatable price of FREE! Now that's my kind of price.

 Did you gather the items I listed yesterday? The craft glue, scissors, ruler, pencils, yarn, and a brightly colored magazine? Also, remember the optional item to add that additional glimmer to your glamour? The nail polish?

 Okay, follow these few easy step and you, my friend, will be adorning these newsprint gems in no time.

First of all, find a colorful page in the magazine. Then cut an isosceles triangle like the 3 inch one featured on the right Next, lay the base of the paper triangle against the pencil. Roll a little bit of the triangle around the pencil. Now, squirt some glue on the remainder of the triangle and roll, baby, roll.

 Once the sides of the glued paper triangle have adhered, slip the bead off of the pencil while the glue is still wet. Stack the beads upright to dry.

Once the glue has dried the moment has come to add a layer of luminescence...the nail polish. The color of polish I used was rosy clear with a lovely compliment of glitter dust. I think the polish brightened the colors of the newsprint while smoothing out any ridges on the sides of the Simple Saturday Magazine Beads.

Experiment making paper beads with wrapping paper, comics, or construction paper. Also, maybe use red or blue or even black nail polish. That'd be cool, would it?

I am pleased with the way my beads turned out, aren't you?  Subtly sensation! 

Simple Saturday Prep: Magazine Bead Bling

 I mention the word 'bling' and look who shows up...Mr. T, the Father of Bling. He's scowling at me as if to say, "I pity the fool who makes some bling without me."

Chill, T. You're right. We're making some bling tomorrow. You're welcome to join in, if you'd like. Actually, you and your old A Team buds will probably like making a Simple Saturday craft. This stuff is right up y'all's alley.

Here's what you will need to gather up to make Simple Saturday Magazine Bead Bling: a colorful magazine, scissors, Elmers or craft glue, a ruler and  a couple of pencils. An option, one that will add true sparkle to your bling, is nail polish.

So join T and me tomorrow, won't you. We'll have some great fun together.

Maybe enjoying a little craft time together might soften his scowl some. He seems perpetually tense, doesn't he?

I just hope he wears a shirt, don't you?

Simple Saturday: There's Something Alive Out There

 Okay, Tripod and I have ventured out into the backyard with tremendous trepidation.

My not-so-brave pup is giving a three-legged point toward the over-grown milkweed that spreads out as wide as a Volkswagen and as tall as a corn stalk. (Well...that might be a little exaggeration. But...hey...I'm a Texan. We're free to make a Tall Tale out of just about anything, aren't we?) At any rate, the milkweed plant is plenty big, as are the other plants in my backyard butterfly garden.

Tripod's adamant. Something is happening in the garden. He's not loosing his point until I find out what's going on amongst the blossoms and the leaves.

And what do you know? Lo and behold...who do I spot but THE hungry caterpillar!  Eric Carle ain't got nothing on this guy. Nothing!

Y'all, Tripod and I spent the better part of a sunny Simple Saturday just watching this fellow destroy milkweed leaves. Destroy, I say.

Monarchs love milkweed. Maybe more than I love chocolate. They lay their eggs it. Their caterpillar selves chow down on all the leaves later to form cocoons in what's left of the plant. Cool, huh?

I'll keep you posted when Mr. Nibbles transforms into a lovely chrysalis such as the one pictured to the left.  If you look really, really closely at this picture, you can see the faint outlines of the gorgeous Monarch butterfly wing patterns through the thin, green chrysalis casing. Isn't that the coolest thing ever?

 And...the most incredible thing about these cocoons is the iridescent row of stunning gold beading. Honestly, my dear friend, the gold accents in these things don't even look real. It's like, how in the world did Nature create something as stunning as this? Really.

No wonder Tripod was antsy. Shoot...one of the thrilling stages of metamorphosis were going down in the backyard butterfly garden. Can you blame him?

This Simple Saturday was just about as perfect as a Simple Saturday could get. My only regret is that you weren't here to share the excitement with us.

Simple Saturday Prep: There's Something Alive Out There

 Tripod has been jumpy lately...repeatedly returning to the back door...over and over and over again.

Not so much wanting to go outside and do...well...you know...his business. Instead seemingly wanting to tell me that something is happening out there. Something transformative. Something new. Something strange. Something alive!

Though I'm a wee bit creeped out with my dog's behavior, I'll brave the bushes and go check it out.

 Hey! Better yet...let's you and me go together, shall we?

Come on. We've spent over a year of Simple Saturdays together, haven't we? Stick with me this one time, will ya? No supplies necessary. Simply hold my hand and let's venture out into the Land of the Unknown...my own backyard.

Simple Saturday: A Dragon's Lair Diorama

This Goofus-McDorkel Dragon could make a home in your pocket with absolutely no trouble at all. The dragon we're fashioning an abode for is of the fire-breathing variety ... Treacherous with a Capital T, right Mikki?

To begin, we need a dragon drawing. Unlike yourself, I am absolutely no artist. That being said, I simply printed out yesterday's Mr. Fire-Breather on the computer. I cannot encourage you enough to draw a dragon yourself. You can do it. Let all of your steamy inhibitions out, and draw away. However, I, my dearest friend, am in a time crunch.

Here you can see the Simple Saturday Dragon's Lair supplies that I gathered up - black construction paper, backyard greenery, shells, scissors, plastic critters, and a print-out of old Mr. Fire Breather. No fire-proof gloves, though. If we work fast, I think I'll be safe.

Remember yesterday when I said Mr. Fire Breather needs his own secluded corner of the Earth? Well, that's exactly what we'll be making...a secluded corner diorama. And...here's how.

Fold the construction paper in half lengthwise. Make a good crease. Now...fold it in half the other way, making a good crease there, too.

As pictured on the left, cut midway along the lengthwise fold up to the creased fold. Then cut triangular shapes using the midpoint crease as a guide.

Now you're ready to form that scary secluded corner by simply folding the flaps formed by the triangular cuts. Cool, huh?

Go ahead and use one of your spare triangles and make a little top structure on the lair, if you'd like to, and we're in business.

Trim the edges of your dragon drawing, leaving an extended tab at the base of your drawing. Make a snip in your tab much like the one you made to create the corner of your diorama. If you overlap the tab's edges it will stand up more securely in the lair. Tape it to the base of your lair...and beware!

  I went ahead and decorated the edges of my lair with small branches of my backyard plants...bits of oregano and rosemary...shells, tiny plastic lizards, snakes, spiders, and crabs. Dang...I'm getting freaked out just typing this. Look at those teeth! And the yellow eyes. Creep-a-dellic!


But, maybe...since our dragon's lair is overgrown with herbs, such as fresh oregano and rosemary, Old Lizard Lips just might be an herbivore instead of a carnivore. It's possible... Maybe...

Still...I'd stay clear of aerosol cans if I were you.

Simple Saturday Prep: A Dragon's Lair Diorama

Even a fiend, such as this, needs a place to rest his scaly head, wouldn't you say? A place to sip some Malignant Tea and nibble on bloody finger cookies before bedtime? A secluded corner of the world where he can store his propane tanks? A place to get his spark rejuvenated?

Tomorrow, let's make a Simple Saturday Dragon's Lair...only if you dare!

We can go about this a couple of ways, my friend. The ultra-cheap Simple Saturday method or we can spend a tiny bit of money and make a Luxury Lair, if you'd like. (You know...if we make the Luxury Lair old Fire Breath might be inclined to take day off and just chill out a little while. Get it? Chill out. Ha!)

 Gather up some dark-shaded construction paper (big sheets), a drawing of a dragon (traced or free-hand by you - the best kind of drawing in my book!), twigs, rocks, dark scary stuff, glue, scissors, tape...and if you must...a scary plastic dinosaur to double as a dragon.

And maybe some fire-proof gloves... 

Simple Saturday: The World's Simplest Hummingbird Feeder

 You know me and my book buddies, right? Well, a dear friend, Jeanette Larson,  has written this g-o-r-g-e-o-u-s book about hummingbirds. I'm super lucky because she has shared with me before it hits the stores.

These creatures amaze me! They're beautiful and so darned quick. And they love, love, love the color red. Isn't that cool?

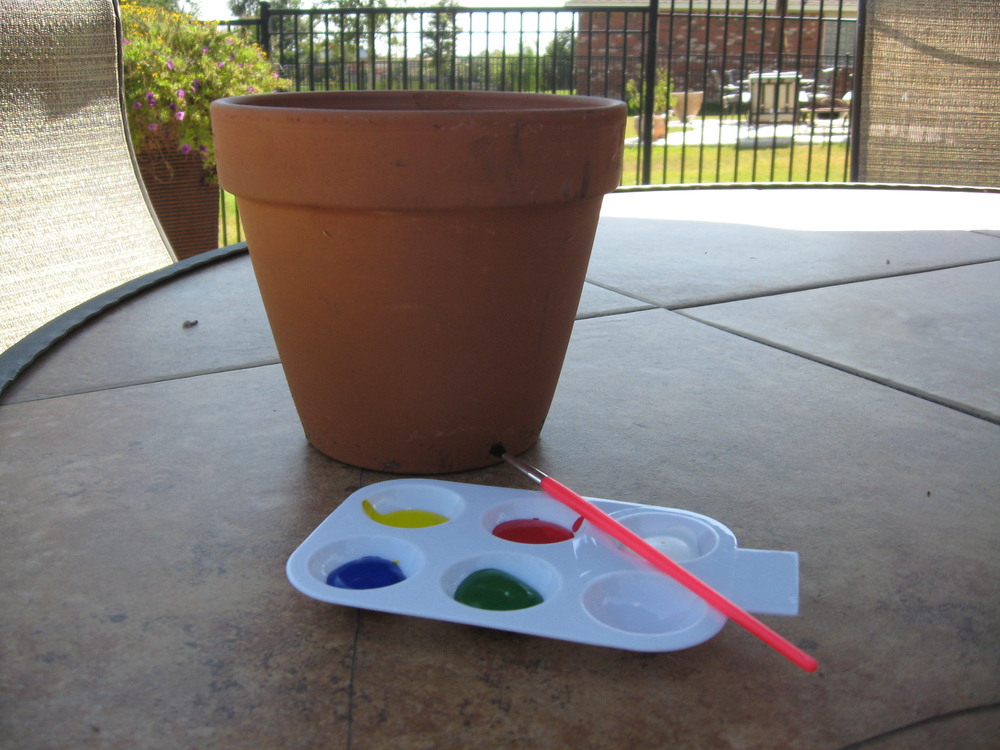
Today let's make something special for the hummer, shall we? You had to gather up a few more things than usual, didn't you? Don't worry, though. This feeder is still super simple to make.

Let's check the list - a small, clear jar, a piece of wire, water, food coloring, sugar, hammer, and nail. We will be using the stove top and a saucepan, too. Okay...let's get started!

Let's go ahead and make the hummingbird nectar first. It can be cooling while we make the feeder.

All I did was boil one cup of water. When the boiling bubbles started rolling I mixed 1/4 cup sugar in the water and stirred until the sugar dissolved in the water. Then I added some drops of food coloring in there and let the nectar boil for 2 more minutes. Afterwards, I took the pan off of the heat to let it cool while I made my cool Simple Saturday Hummingbird feeder.  

I used the hammer and nail to poke a few beak-sized holes in the lid. I filled the jar with my nectar and closed the lid fairly tightly. Then I took the wire, wrapped it around the lip of the lid, and twisted it together. All right! Ready to go and find those hummers!

 I simply suspended my Super Simple Saturday Hummingbird Feeder from a porch post hook. That's all there is to it, my friends.

Here's the deal about that nectar, though. You're going to have to keep it fresh. Change it every two or three days. Because once these delightful creatures find your feeder, they'll return to it often if they can count on it being hummer yummy all the time.

You can make more nectar can keep it refrigerated, if you'd like. Just keep a 4 part water to 1 part sugar mixture in there at all times, keep your feeder clean and fresh, and you will have some visitors coming by, my friend!

 I hope that your feeder attracts swarms of hummingbirds. They're such fun to watch. Jeanette told me that hummingbird migration season has begun. Isn't that the coolest thing ever?

Let's get out there and flag 'em down, shall we? Hey, hummers! Get your nectar right here! Sweet, red, yummy nectar...right here!


Simple Saturday Prep: The Simplest Hummingbird Feeder in the WORLD!

 Want some of these cute little critters to come by and visit sometime? Chances for hummingbird visits are good if we make a special treat with these busy darlings in mind.

Make it and they will come, right?

Tomorrow gather up a small, clear jar (I'm using a baby food jar.),  a piece of wire, a nail, a hammer, water, sugar (yum), and red food coloring. That's all we need to make something simply delectable for our teeny-tiny feathered friends.

Sometime today take a stroll around your yard or scope out a post on the porch... find just the right spot to hang your hummingbird feeder. It needs to hang in a place where you can access it easily, because we'll need to be certain to keep the...

Oops, I'm getting ahead of myself. See you tomorrow, pal.

Simple Saturday: The Amazing Multiplication Memory Game

 I took a trek down to an  awesome elementary school in fabulous South Austin to find the perfect team of mathematicians to assist me in this week's project. All three of these brilliant boys are smart, good-looking, crazier than a clown, and have 8 fingers and 2 thumbs. Therefore, we can proceed with our Simple Saturday Super Simple Multiplication Memory Game.

Note: I find the boy in the center particularly charming to behold, don't you?


To practice your Table of 9's first lay both hands on the table. Count all your digits. 1-2-3-4-5-6-7-8-9-10. All there? Good.

Okay, let's try 7 X 9. Oh, how I wonder what the answer to this equation might be. Don't you? Let's turn to the digits, shall we?

 Our multiplier in this equation is 7. Let's simply count fingers, beginning from the left pinky, moving sequencially to the right hand. Here we go. 1-2-3-4-5-6-7.

Okay, fold the 7th finger under, like this. Go ahead...it won't hurt ya.

 Here's the slightly tricky part.

Think of the bent finger as a quantity divider. Group all of the fingers to the left of the bent pointer as a whole number. Let's count them. 1-2-3-4-5-6. There are 6 digits to the left of the bent one, correct?

 All right...Let's do the same thing for the fingers to the right of the bent finger. Let's group them together as one quantity. How many numbie nails are there? 1-2-3. That's it...3. Therefore, my friends, the answer to the equation 7 X 9 = 63!

Buddy, this trick works every ding-dang time! Check out 6 X 9 = 54.


 How about 9 X 9 =81? Cool, huh?

What about 1 X 9 = 9? Will that work? Check it out!

Pretty slick, isn't it? I thought you'd like it.

Simple Saturday Prep: The Amazing Multiplication Memory Game

 Einstein said, "If you can't explain it simply, you don't understand it well enough." Diss...

All right then, Albert, tomorrow I am going to show you the simplest of simple ways to memorize the Table of 9's. You won't believe how easy this sucker is.

Today I hung out with these three goofy guys and completely astounded them with this stunt. Okay...maybe astounded might be stretching things a bit...but they were impressed. That's a fair statement.

 So, if you have eight fingers and two thumbs on your hands, then we're in business, pal.

That's right...no long supply list is necessary to have some multiplication fun the Simple Saturday way.

Strange...I feel a bit of Einstein Pressure to be certain to explain this simply enough for you. Hmmm. Check back with me tomorrow and see how I do, won't you? I passed the goof ball test today. Surely Einstein Scrutiny can't be that bad.

Simple Saturday: Apple Teeth

 Somehow I don't think that Edward is stricken with a pointy set of Apple Teeth...but a girl can dream, right?

Now that I have your full attention, did you gather up the goods? An apple, a paring knife, and a mirror? Edward would have to leave the mirror behind, right? Mirrors aren't exactly a vampire's best friend.

 Making apple teeth couldn't be easier. Go ahead and cut that apple into fourths. Now slice a thin piece off of the side of one of those fourths. Make it about the thickness of a human tooth. Cut it about as wide as your own mouth. Getting the picture?

 Now, form some Simple Saturday Apple Teeth in the thin wedge of apple by cutting tiny 'v' shapes in the fruit. Create a daring new dental look. Maybe some oversized eye teeth would be nice.

Next, simply slide your apple dentures under your top lip. Pucker up and you've got yourself a snazzy new set of Apple Teeth. Some that Billy Bob and Bubba would be proud to call their own.

I think John looks pretty darned cool wearing that manly set of Simple Saturday Apple Teeth, don't you?

Edward ain't got nothing on John, right?

Well, like I said earler...a girl can dream, can't she?

Simple Saturday Prep: Apple Teeth

Tomorrow's Simple Saturday activity is the classic of all classics, a childhood fave, a riotous relic of all times...and just good old silly fun. If you have never made Apple Teeth, we have to fix that travesty right here and now, dear friend. And that's all there is to it!

Supplies, you ask? Find yourself an apple -  Gala, Delicious, Granny Smith ... anything but Rotten will do - a paring knife, and a mirror.

You'll want to be sure and have that mirror handy. And ready for some serious belly laughing - a natural side effect of sporting Apple Teeth.

I'll see what I can do to get ol' Mr. John to model a set for you. He's the ultimate good sport...and kinda cute, too!

Simple Saturday: Creating A Reader's Theatre Script

 I told these kiddos that we're going to write a Simple Saturday Reader's Theatre Script today and just look at them. They've gone bonkers with excitement! And, that, my dear teacher friend, is just what your students will do when you present this lesson to them. (Well, we can hope, can't we?)

Let's get started, shall we?

Okay, my latest best read has been Barbara O'Connor's The Incredible Secret of Owen Jester. I read this book as a feature for ReaderKidZ, a new website featuring the best books ever for K-5 kids, and I have been stuck on it ever since!

Anyhow, I chose to adapt a short scene for you to demonstrate just how easy it is to write one of these puppies. Click here for the .pdf print out and follow along.

 As you can see all you need to do is pick a short scene and:

  • Create a list of characters
  • Describe the setting
  • Designate speech cues - or who is going to talk when
  • Figure out what internal monologue the narrator will describe
  • Give some direction for the character's dramatic action

But heck, you and I know that where there are kids...there is plenty of drama!!!

The main purpose for having the kids write one of these is to get their cute little noses back into the text - doing that literary analysis, comprehending, and just plain old having reading and writing fun!

Simple Saturday Prep: Creating a Reader's Theatre Script

 Teachers! This week's Simple Saturday post is dedicated to you...fellow Salts of the Earth!

Now you know what natural hamms kids can be, right? And we also know how darned hard it is to get them to reread text for comprehension and literary analysis, don't we? Well, how about we combine both of these needs by creating Reader's Theatre pieces out of books that they love! What a novel idea! (Novel...get it? heh, heh.)

 So tomorrow, all you'll need to do is download a special .pdf I've made for you. That's it!

Oh, you might like to pick one of your fave stories to adapt  just to see how easy it is to craft a Reader's Theatre piece. It's fun, too!

Watch out, Broadway. Here we come!

Simple Saturday: AToad House

 Gotta love these cheerful toads, don't you? Why...the one squatting in the top center looks like a yogini, doesn't he. No...he's a frogini, right? Ommm...

These critters have inspired me to keep it zen and take my materials...an old clay pot, a thin paint brush, and some acrylic paints... in the backyard where I can sit beside the peaceful gurgle of our rock fountain and paint.

That's all you do. Paint. Go ahead and decorate that clay pot to your heart's content.

The inspiration for my toad house is an amazing book I've just read entitled The Fantastic Secret of Owen Jester written by Barbara O'Connor.   In this book Owen Jester has a pet bull frog named Tooley Graham that Owen must...well...read it for yourself to find out what happens to Tooley. Really...read it. You'll be oh-so-glad you did!

 Anyhow, back to the Simple Saturday Toad House. After you've decorated the house find a shady, buggy, damp, swampy place to conceal your toady structure. I found a nice spot amidst my marigolds. Where are you going to place yours?

See how I layed the decorated clay pot on its side? I also dug in the soil a wee bit to help stabilize the dirt-side of the pot.  I also made a nice little bed of damp mulch inside for my guest....a kind of toad-like red carpet, if you will.

 My Simple Saturday Toad House is complete! Now I wait and hope that some sweet toad like Tooley Graham will move in.

Oh, my! While I was wandering about my backyard communing with nature look at who has come by! A whole troup of toads!!! 

And not just your average, everyday toads, mind you... Look! One's holding a warrior pose... there's one holding the tree pose... The toad inside the house is peacefully resting in the lotus position. Wow! I've got a my own band of backyard yoginis...or rather, toad-inis!

All I can say to that is, "Namaste'."